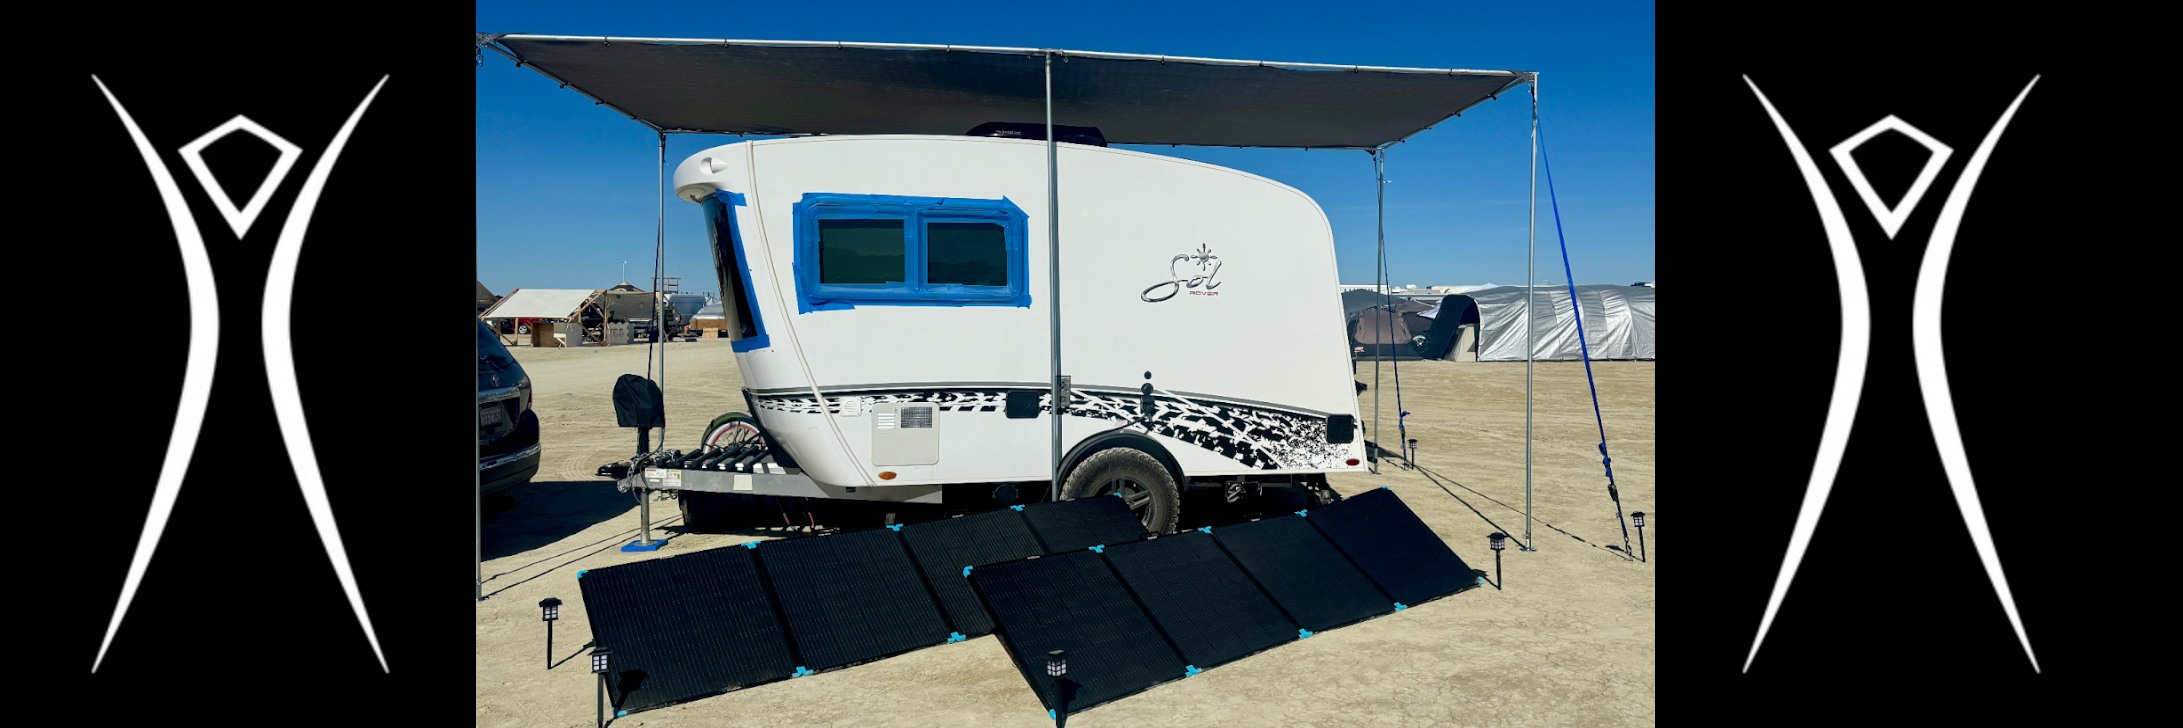
The constant buzz of gas generators and the associated exhaust fumes are so ubiquitous at the annual Burning Man festival that soon after arrival, it becomes commonplace for almost everyone to tune out the annoying noise and toxic smell. Yet Burning Man, as an organization and a culture, faces the reality that we have over relied on fossil fuels and that it is time for a change.
Can Burning Man become “Sustainable Man?” In 2019, Burning Man Project published the 2030 Environmental Sustainability Roadmap with the following goals: handle waste ecologically, be regenerative, and become carbon negative by 2030. To reach these goals, every attendee should assess what one can do on an individual and a camp level to make a difference.
It was only a month before this year’s Burn, and my husband Jesse and I were still debating whether we should choose a generator or solar setup for this year’s playa time with our new trailer. Even though Jesse has worked in the solar industry for 20 years, we were bringing our new trailer equipped with A/C and all of the creature comforts of RV living. Since this setup requires a decent amount of power, the ‘easy’ solution would be to purchase a gas generator. In such an extreme environment, it is easier to choose what has been tested and relied on for years.
By choosing solar, it felt like we would be taking a risk on new battery technology and solar panels in one of the most extreme places without having a lot of time to experiment. It was our eighth Burn, but our first one together, and we really wanted everything to go smoothly.
Relying on fossil fuel powered generators comes with many costs and concerns including fuel transportation, fuel storage, and various safety issues, not to mention the toxic fumes. While discussing the logistics of transporting fuel and the constant noise adjacent to our sleeping pod, along with what truly aligns with our values, we leaned into solar and decided to do our best to research and adopt a system that allows the sun to power our playa home.
One of the things that motivates us to return to Burning Man repeatedly is the Burner culture that encourages one to grow, experiment, innovate, and push forward, even when it is hard or uncomfortable. If we value environmentalism, then this is a space we need to lean into.
A quick primer on terminology can be helpful. Power capacity is measured in Watts or kilowatts (kW) and power usage over time is measured in kilowatt hours (kWh). A generator or solar inverter will have a kW rating telling you how many of those lights or microwaves you can plug in at the same time. A battery will state how long it can power those loads in kWh.
After compiling a list of our expected power needs, the first battery/inverter combination that we researched was going to weigh a whopping 110 pounds and have a 3800 Watt capacity. My goal was for us to have a battery that we could each lift by ourselves. We liked the power capacity, but not the weight.
With a little more research, we found a 2,400 Watt and 2,560Wh inverter/battery/charge controller combination that weighs just under 70 pounds. The auxiliary 2,048Wh battery weighed 46 lbs and could be carried separately. Our system could handle 2,400W and had a battery capacity of 4,608Wh.
This power station has a carrying handle and integrated wheels. Additionally, the system comes with an app that monitors energy usage and communicates via Bluetooth.
The final cost of our brand new system was the same or less than we would have spent on a high quality generator and fuel set up. Our entire solar system totaled roughly $3860, but with a 30% federal tax credit (ITC) for solar and battery investments, our total actual cost will decrease to $2675. Some of the solar companies offer discounts for first responders and teachers, so that may be worth researching if it applies to you. More information on the tax credit can be found on the irs.gov website.
Our major costs were the (2) sets of 400 Watt solar panels ($600/each), the primary battery/inverter ($1,622), the expansion battery ($1,000), and the storage container including a filter and a fan ($38). See below for steps on how to create a safe storage box for the batteries.
An important issue to consider is how much sunshine you will need each day to ‘refill’ your daily power needs. It would be ideal to have sunshine on the panels for seven hours per day, from 11am to 6pm. On average, the two sets of 400 Watt rated panels (total 800 rated Watts) gathered about 700 Watt hours per hour on the playa. Thus, we could fully recharge our total 4,608Wh battery capacity with seven hours of sun. With more panels, you have the potential to charge your battery even quicker.
On the first two days on the playa, we had a large camp footprint and we were able to capture that full seven hours of sunshine. Once our neighbor friends arrived and the, this decreased our sunlight to 5.5 hours per day (11am to 4:30pm). Since it can be difficult to have a guaranteed large footprint in a festival setting, the extra expansion battery is a good bet. Also, consider mounting your panels on top of something above the ground to maximize sunshine.
We ran the 13,500 BTU air conditioner for one to three hours a day and we used the lights and microwave as needed. For every hour we used the A/C, we used 1,600 Watt hours of energy.
Luckily, we had ideal weather for the days we were on the playa this year. In years where you may not have sunshine for over 24 hours or more, this would give you yet another reason to add an expansion battery for this size system.
For the 2024 Burn, we were able to run all of our appliances and A/C without interruption. Our solar project had passed its first trial in the desert. Success!
Simple steps to create your playa solar set up and leave the generator at home:
1. Determine your power needs.
The first step is to calculate how much power your RV, trailer, or van will use each day.
Here is a list of typical appliances used at Burning Man and their energy consumption per hour:
|
Appliance |
Wattage Range |
|
Air conditioner (13,500 to 16,000 BTU system) |
1,350-1,600 (note the “start-up” amperage) |
|
Microwave |
750-1,500 |
|
Refrigerator |
400-1,000 |
|
Induction stovetop |
500-1,800 |
|
Electric water heater |
1,000-1,500 |
|
Lights |
50- 200 |
|
Power outlets |
10-100 |
Decide how many hours per day you will use each device and then you will know how many Watt hours you will need for battery storage.
We calculated that we would use the A/C two to three hours a day, the microwave and lights sporadically, and the USB chargers overnight. We determined that we would need approximately 3,000Wh (3 kWh) per day, but on the playa, we found that our average use was closer to 3,300WH (3.3kWh) per day.
2. Choose your power station (battery, inverter, and charge controller) and optional expansion battery.
There are multiple options available now. When researching battery options, look for “portable power stations with panels.” Consider adding one or more expansion batteries depending on your needs. Since there are a range of battery weights, make sure to consider the weight of the battery before purchasing it.

3. Choose your solar panels
Having lightweight portable panels made it especially easy to transport them, set them up, and adjust their location once camped. Some panels fold neatly in a carrying case. Again, just as with the battery, you will want to assess how much energy you want to capture per hour. We found that solar panels with 800 Watts of capacity (two sets of 400 Watt capacity) would be sufficient for one trailer.

4. Install a “soft start” device onto your A/C unit.
When you turn on your A/C, it requires a large surge of power to start up. Installing a “soft start” device will allow you to run your A/C unit with a smaller battery/inverter combination and thus save money. It works by modulating the needed start-up surge of amperage and will not change the unit’s efficacy. Research your specific air conditioner model and find the correct soft start device that will work effectively. If you are at least semi mechanical, you will be able to install it yourself.
5. Build a shelter for your battery.
At this time, most of the portable batteries are not waterproof or dust-proof. This made us nervous. Since we were not able to find a shelter that was sold with a battery, we designed a simple solution. With some basic supplies from the hardware store, you can create a safe shelter that will also prevent overheating issues.
Steps to build a shelter with vents:
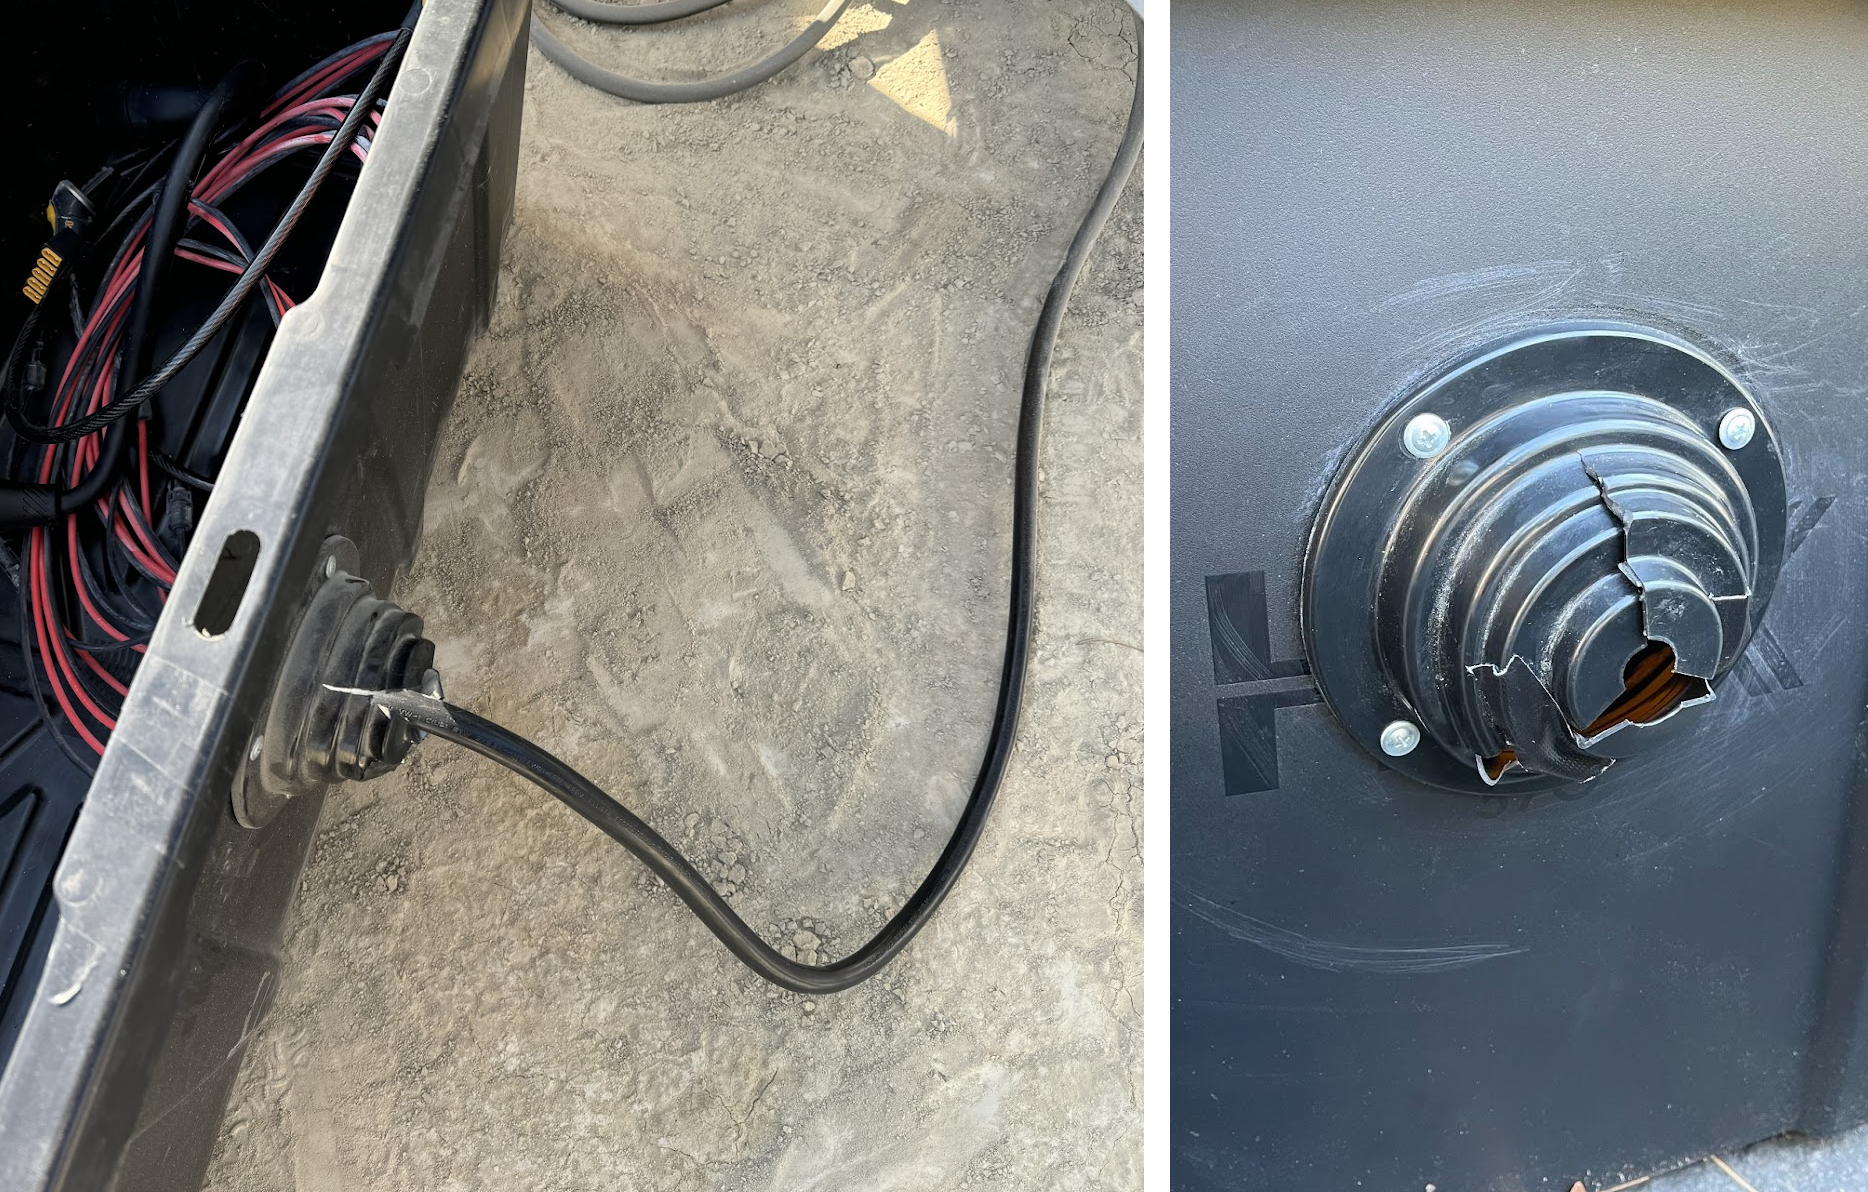
- For our shelter, we picked up a large 57 gallon plastic tub (H 19.5” x W 20.7” x L 45.4”) from a hardware store. Jesse cut three holes into the box: one for air in, one for air out, and one for the wires and lock. To cut the tub, Jesse heated up the plastic with a hair dryer so that it was malleable and would not crack. Second, he used a utility knife to cut out small holes in the tub.

- The hole on the long side was 3.5” diameter and was outfitted with a “boat transom.” This is a large rubber gasket that allows cords and a cable bike lock to thread through the box and still retain waterproofness.
- The two other holes were placed on the shorter sides. For the air intake hole, Jesse took a 12” x 12” x 1” MERV 8 filter and cut out a square hole for it. The filter was fixed to the bin with the HVAC aluminum foil tape which seals gaps. On the other short side, Jesse cut out a 3.5” x 3.5” hole and taped in a small USB fan to help circulate air in case of increased temperatures. We kept the fan running the entire week; however, if you keep your box in the shade, you could probably skip this step.
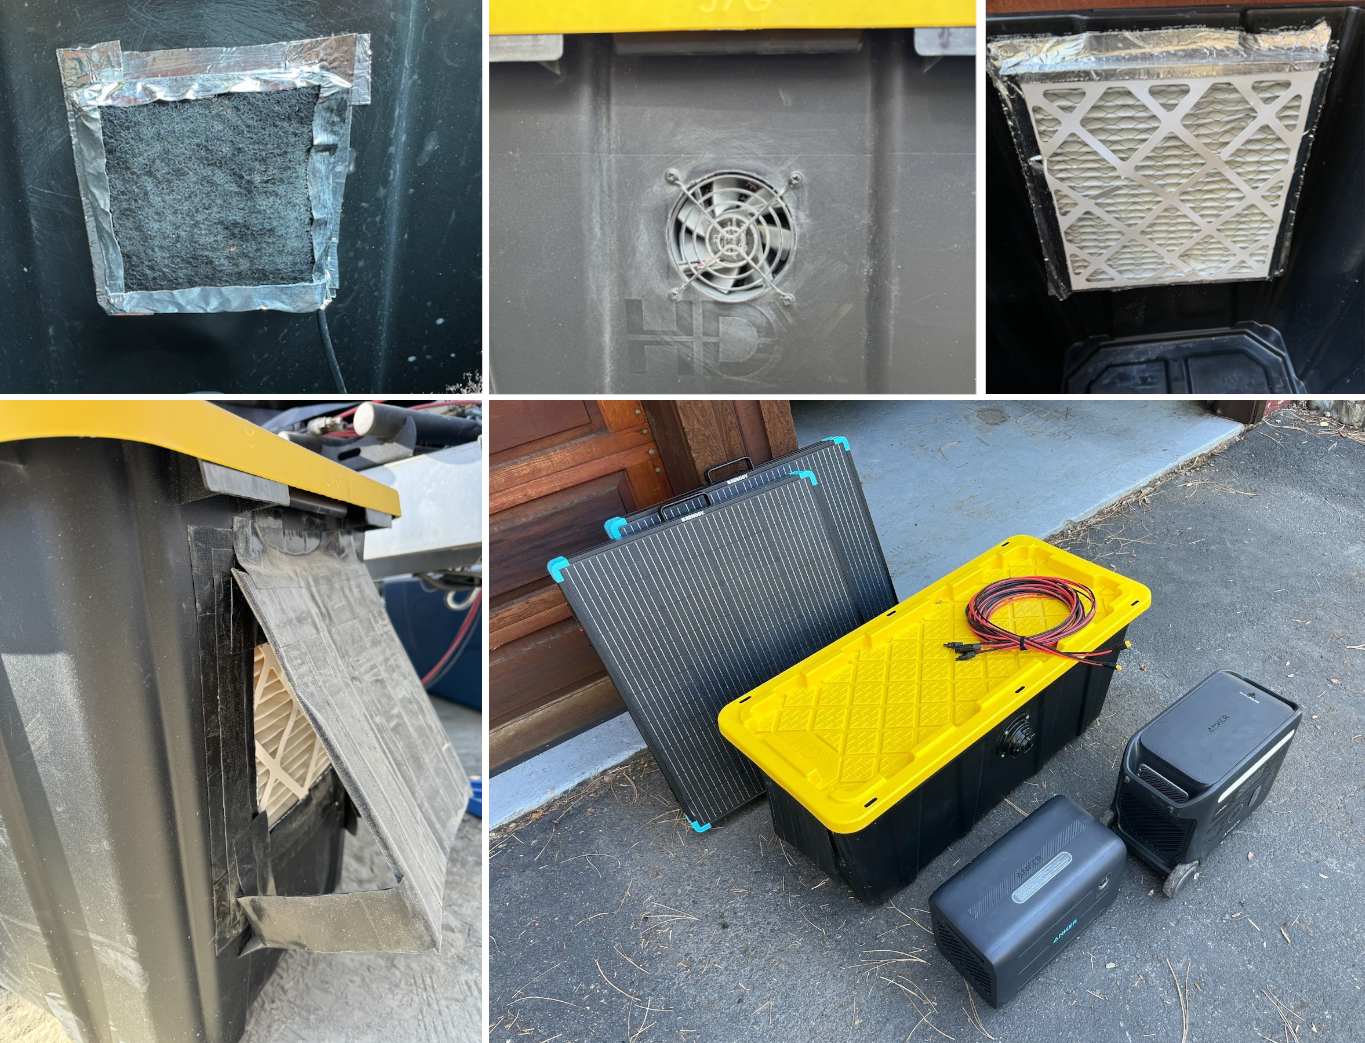
We stored this box on the ground all week, but we could have raised it on the front triangle of our trailer in case of a rain and mud situation. We observed zero issues with overheating, kept it mostly dust-free, and completely dry.
6. Secure your system.
Use a bike lock to safeguard the battery to your RV or trailer set up.

7. Test your system at home.
It can be a good idea to test your system in a relatively controlled environment. We tested the system by charging, using, and recharging the battery a few times prior to departure.
8. Take your system on the road.
I cannot explain how rewarding it feels to set up solar on the playa and to leave the generator at home. The first time you run the A/C or microwave without running a generator feels like magic. Double that feeling when you recharge your batteries using only sunlight!
On the playa, we attached the solar panels to the ground with 8” lag bolts. The solar panels had a convenient metal stand that propped the panels up at a 30 degree angle. The lag bolts pinched the stand to the ground.
9. Spread the word!
Educate your friends, campmates, and other camps. If possible, power some of your house with your new system the rest of the year or use it as an emergency backup power system.
List of supplies needed:
- Portable power station (battery, inverter, charge controller all-in-one)
- Expansion battery (optional)
- Portable solar panels
- Power cords to connect the power station to the panels
- Power cords to connect power station to your energy loads/trailer
- One plastic tub to fit both batteries (57 gallon tub: H 19.5” x W 20.7” x L 45.4” worked for us)
- A cable bike lock to secure the batteries
- Air filter vent that allows the batteries to breathe (and remain water and dust free)
- Small computer fan that plugs into the USB on the battery (to help maintain a cooler temperature)
- HVAC aluminum foil tape
- 8” lag bolts for securing panels to the playa
- Impact driver
Something else to consider is your shade situation. Even though shade would be completely optional for the system to work effectively, we decided to bring a shade structure for the top of the trailer and a vertical shade for the southwest facing side of the trailer.
This shade combination probably decreased our camper’s ambient temperature by roughly 10-15 degrees at the hottest point of the day. Our air conditioner was especially efficient. I often ran it for a few minutes and felt cold right away. Next year, we hope to mount the solar panels on top of the roof, so we most likely will not have the same shade set up again.
Cleaning the panels will likely be necessary and depends on weather conditions. When cleaning the panels, do so either early in the morning or late in the evening to prevent any “thermal shock.” Thermal shock can occur if you throw cold water onto a hot PV panel. The solution is to wash the panels with a squeegee. Fill a small bucket with water and a bit of vinegar for that stubborn playa dust. Avoid pressure washing the panels because any type of chemicals or solvents will harm them.
We live in the California mountains where power outages can be a part of life. At one time, we talked about buying a large gas generator to power our house for emergencies. We no longer feel that this is necessary, and instead, we are looking at setting up our panels at home and adding a new home battery to power as much as we can for as many months of the year as possible. We are loving how multipurpose our playa solar system has become.
From a renewable energy perspective, this year was especially exciting on the playa. The progress is visible in the increasing amount of solar panels within camps and next to art projects. There are also these beautiful moments of silence where you used to hear only generators.
Artists and camps are working towards the org’s sustainability goals. We saw many artists taking advantage of the support from Renewables for Artists Team (RAT). RAT helps artists switch from fuel generators to renewable energy options for their power needs. Additionally, we saw multiple large portable solar power stations, called Dragons, which can power camps or art cars. Riding our bikes under a 30 kW “Dragon” gave us hope that relying on renewable energy can become the norm on the playa.
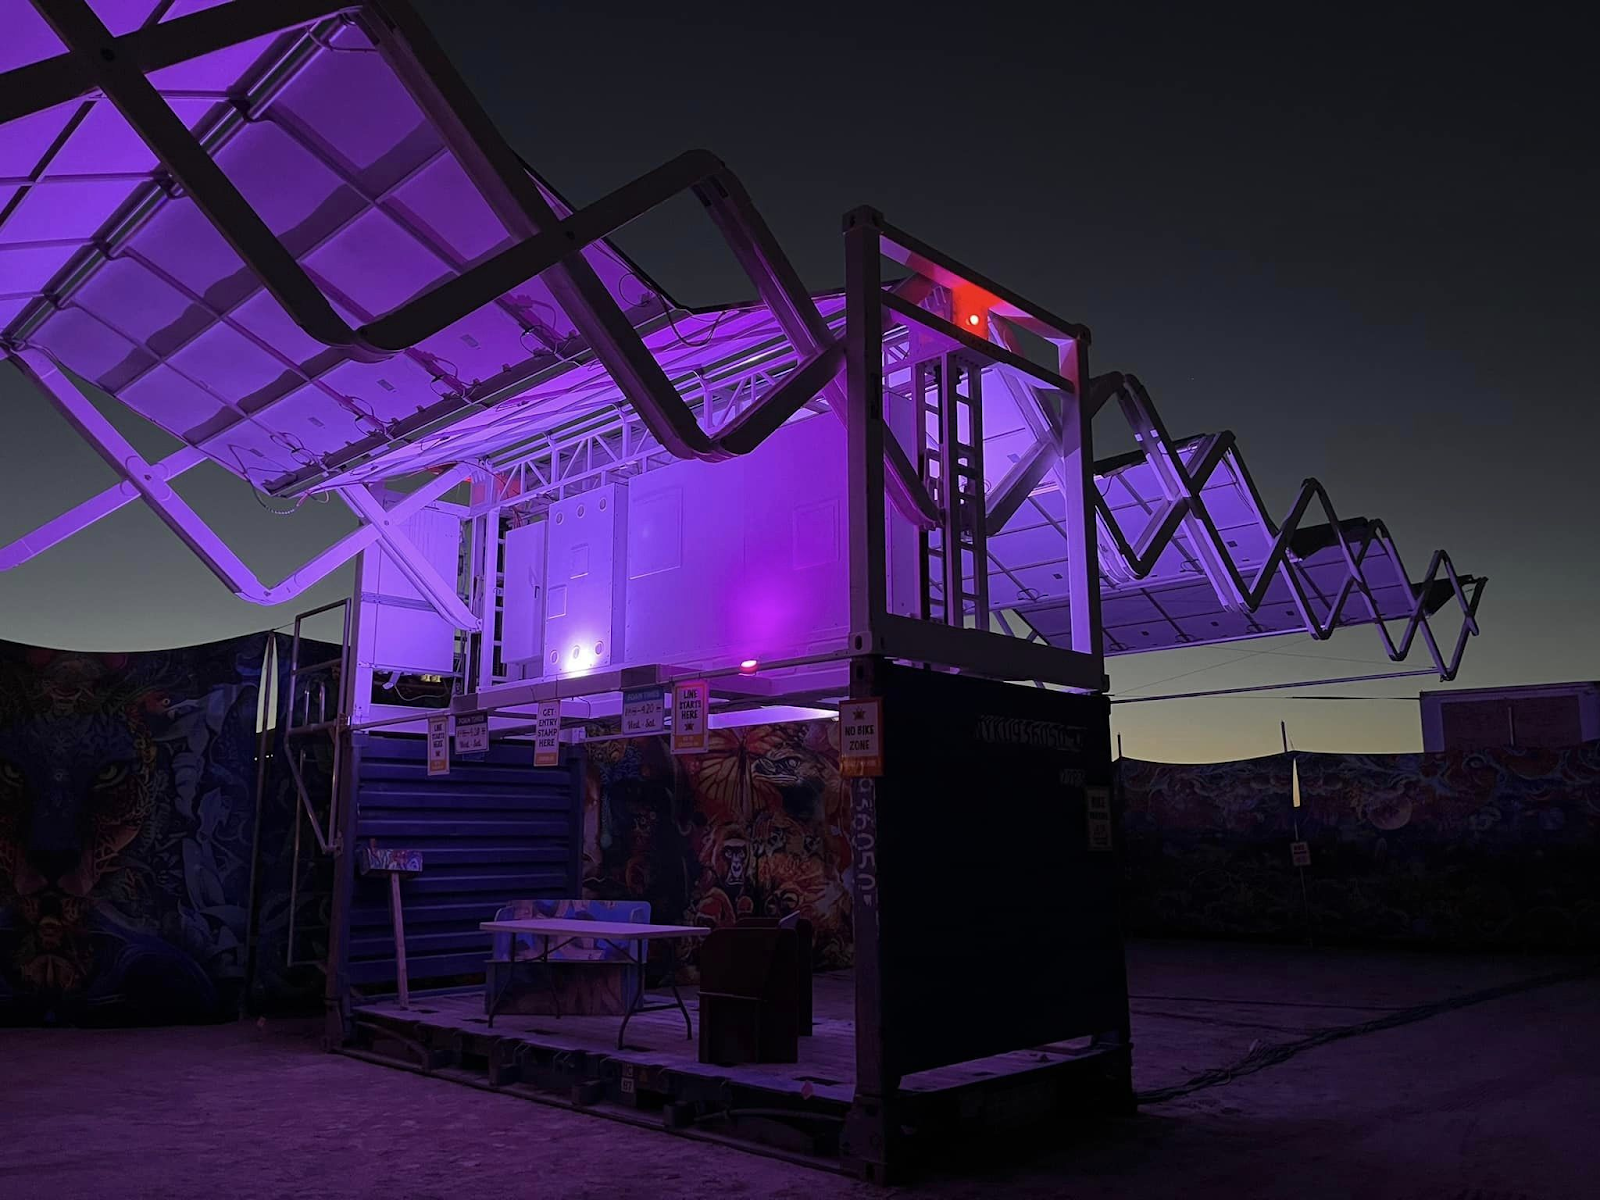
To achieve the org’s goal to be carbon negative by 2040, we all need to participate in alternative energy solutions. If you currently have a generator set up, preparing to set up a solar system will be an investment at first; however, in general, participating in Burning Man is not cheap.
Think of your solar investment as a long term investment towards a better, more sustainable Burning Man - one that is less stinky and has less noise pollution. Embracing alternative energy on the playa is rewarding on multiple levels.
And, in the end, this is what Burning Man is about, right? It’s about letting go of the old, embracing innovation, spreading change, bringing home what we learn on the playa, and spreading what is working outside of the playa. Let’s transition to the other side of this energy solution together.
Solar power and battery technology have improved dramatically over the past few decades. We now have clean, cost competitive tools to embrace a new alternative energy future. Take your first steps, and then educate your campmates. Next, educate your neighbors back home. See you in the dust!
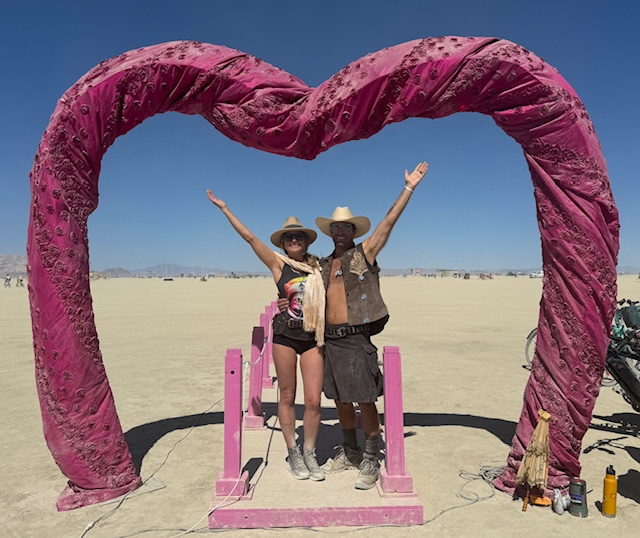
Written by: Jillian and Jesse Quay